3 Buttonhole Woes (and how to fix them)
It’s feeling like Buttonhole Week here at the Haywood Homestead – I’m working on three projects at once, all which need buttonholes and I must have sewn well over 60.
My “everyday drive” sewing machine is a 1964 Singer that doesn’t make buttonholes, in spite of having an array of embroidery stitches. I make buttonholes by selecting different zig zags and turning the fabric around as I make them. Typically I sew the long sides twice to get a superior buttonhole. I’m reasonable at making them now, after a lot of practice.
If I were looking to buy a new sewing machine, a great buttonhole function would definitely be near the top of the “it must have” list.
Anyway, this week’s post features three things that could happen if buttonholes are part of your sewing adventure…
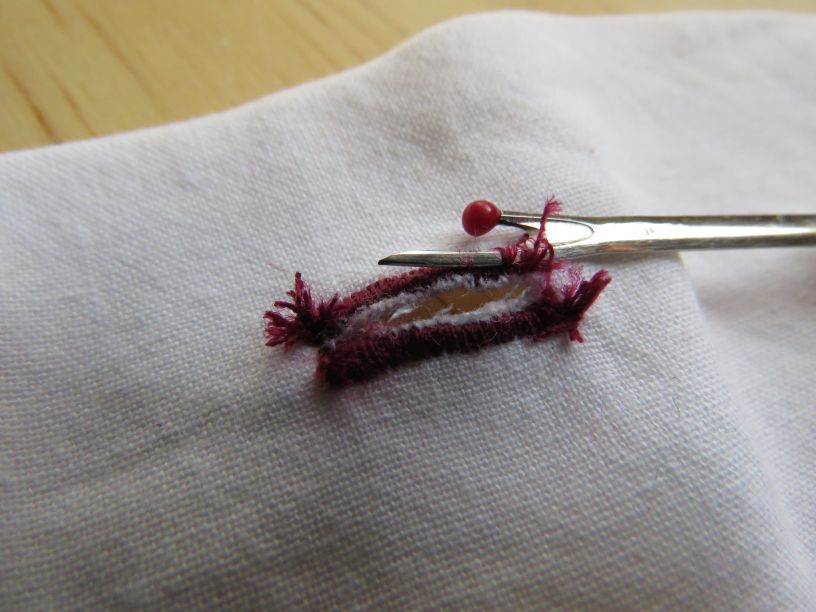
First though, how to unpick a buttonhole. If a buttonhole is wrong it can be carefully unpicked, ideally before you’ve cut the slit. Use a very sharp, good quality unpicker such as a Clover one, and take your time. Cut the bar ends first, then slide the unpicker under the zig zag stitches
If I need to unpick a buttonhole, I prefer to finish making all of them and then go back and fix the wrong one.
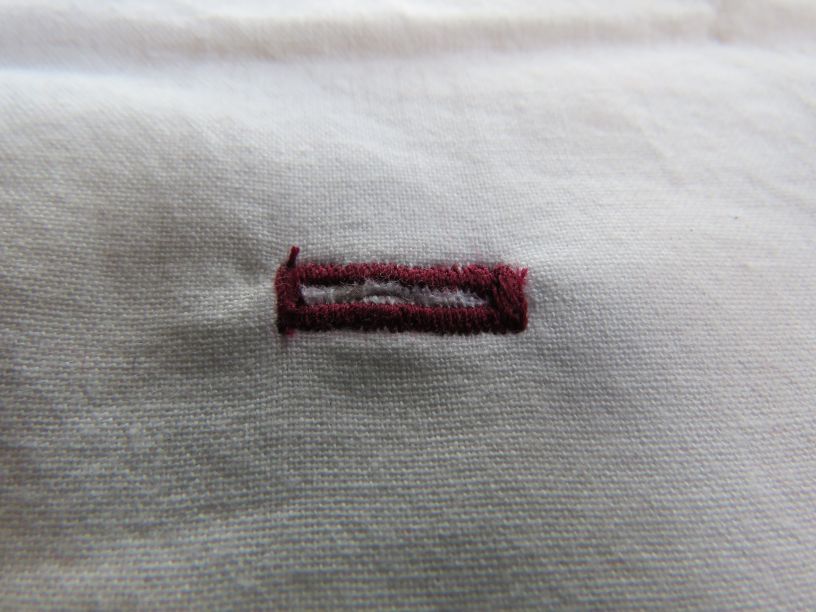
1. Small pleat at the ends of the buttonhole
This is what I mean:
It’s caused by the fabric being too fine or light to support the buttonhole.
Try a test buttonhole using an extra layer of interfacing behind, and see if that helps.
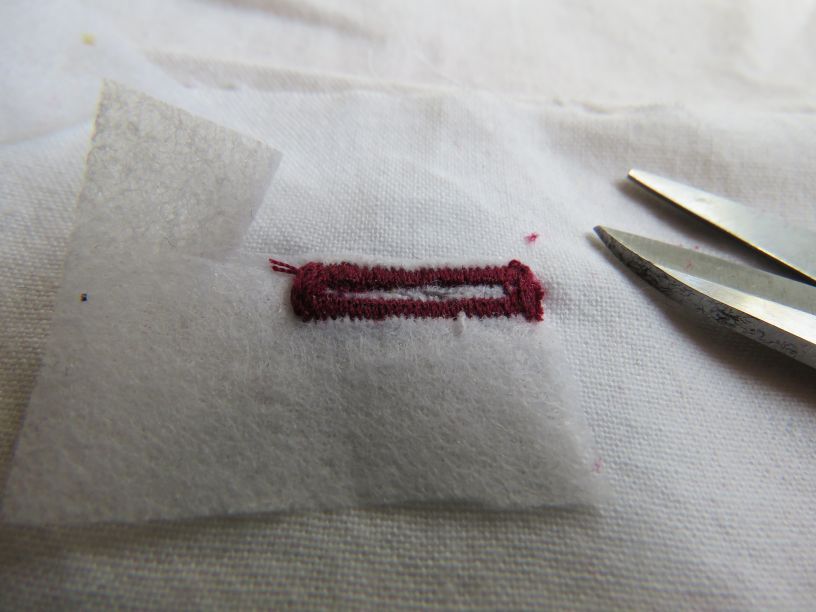
If it’s too late to add a layer behind (say, you’ve finished the garment and can’t get to the reverse side now), try using a piece of soluble tearaway behind the buttonhole.
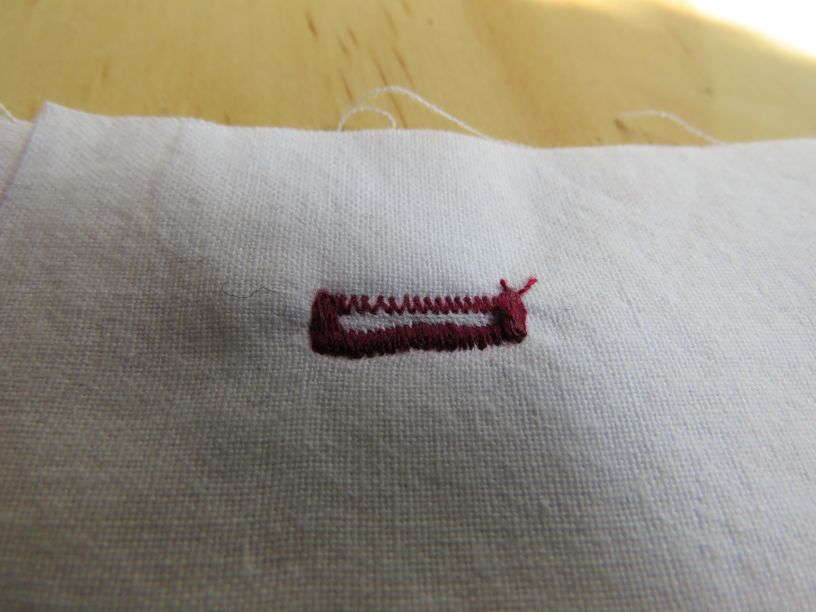
Or you could do what I’ve done below, which is place a piece of firm interfacing (or fabric) behind the buttonhole when you sew it, and trim the excess away afterwards.
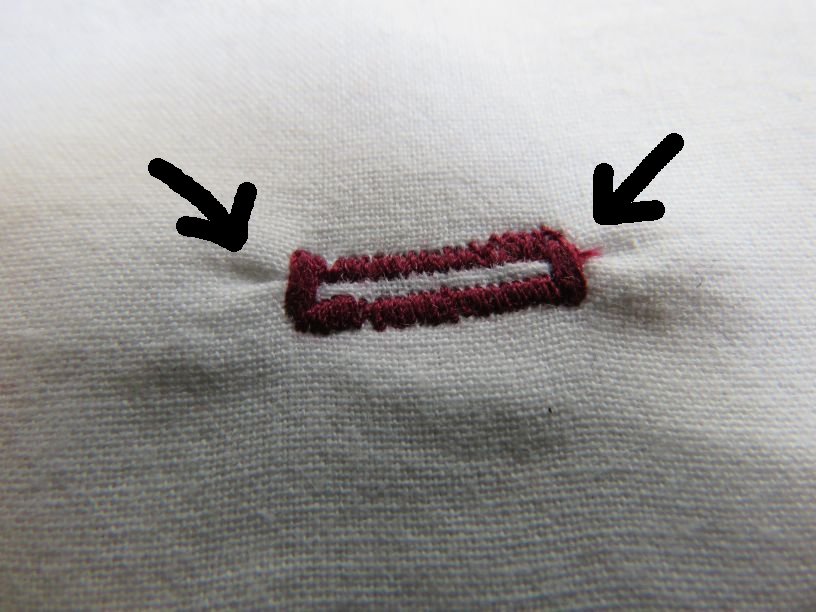
2. Zig zag not dense enough on one side of the buttonhole
This can happen with automatic buttonholes, apparently because one side of the buttonhole is sewn with the feed dogs working in reverse, so there’s less grip on the fabric.
When you get your machine serviced, ask if anything can be done about it – some machines can be adjusted.
Meanwhile, here are three things to try:
- Do a test buttonhole and adjust the stitch length when you do the second side of the buttonhole. Make a note of the stitch length required for each side of the buttonhole and do this manual adjustment when you sew all the buttonholes. It may not work for all machines.
- Stitch over your buttonholes twice, or select a suitable density zig zag to stitch over the scant side.
- Make your buttonholes manually by machine. Find a narrow zig zag for the sides of the buttonhole, and a wide one for the ends (probably the widest one the machine will do). Experiment with the stitch length so the narrow zig zag is dense enough and the wide zig zag stitches on the spot. Sew one long side first, then the wide bar at the end, turn the work in the machine and sew the other long side and finish with another wide bar. With a little practice you can make good buttonholes this way and the more you do the better and quicker you’ll get.
3. The buttonhole is crooked and you’ve already cut the slit
If it makes you feel better, this happens in factories too. Factory machines cut the slit at the same time as sewing the buttonhole. A machinist at Image Wear Corporate Apparel’s factory, where I worked for 5 years, showed me how to fix this.
She said: unpick the stitching.
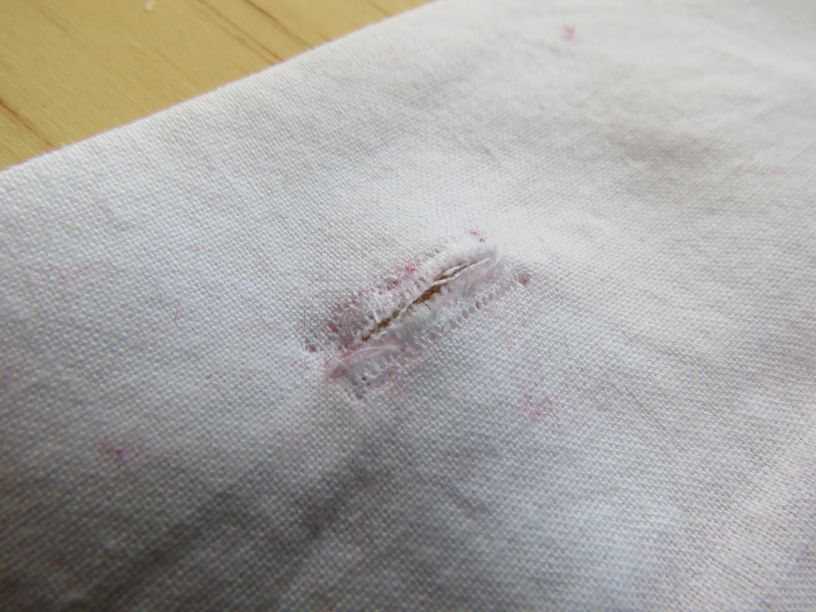
Then, baste the edges together by hand and give it a press. Use a thread colour the same as the fabric (not like I’ve done below, for clarity).

Make a new buttonhole over the top, and get it right this time – no third chances with this!
There’s plenty more I could write about buttonholes, but I’m going to shamelessly plug my own book here, The Dressmaker’s Companion, for more on buttonholes, buttons and other stuff. See if your library has it, or order a copy from an online or in-person bookshop.
Cheers!
PS Here’s a related blog post: using a vintage buttonhole attachment.
Love the tips for redoing buttonholes!
I have a RTW button-up shirt that needs an extra buttonhole at the bust line. It seemed like a simple fix when I bought it (second-hand) but I’m putting it off because I’ve never tried to match someone else’s buttonholes before, and I’m scared I won’t have many chances to get it right. Any tips? I can practise on scrap fabric but it won’t be the same as the shirt itself.
Hmmm… sorry, I can’t offer much in Tip Land except to say practice, and the buttonhole is not very noticeable when it’s done up.
I have heard of some people putting a buttonhole at the bustline that is on the button side, then sewing the button on invisibly on the buttonhole side. It does up so that the button sits on the inside.
A couple of years ago I bought a fancy new sewing machine which has a gadget where you set the button in it and the machine makes a buttonhole to suit. I don’t like it very much as I find it hard to see exactly where the buttonhole will start and to be sure it is in the right place. It is also very fussy if the buttonhole goes over varying thicknesses of fabric.
My favourite buttonhole is a mechanical attachment that goes on my Singer from the 1950s. It takes some fiddling to make sure that you have the right size, but once it is set, it makes beautiful buttonholes. You can even get it to make buttonholes about 5cm long if you make one half without the bar on the end and then go back the other way. It beats the new machine which is limited to about 2.5cm.
That’s a shame – you’d think that all new machines would do amazing buttonholes, given the time they’ve had to get the technology right!
You might try a snap or a small hook and a bar. I usually use just a bar made of thread – hope that makes sense. If you put it on the “underside” it should be invisible.
Let me say I would rather sew pants then buttonholes and I do not sew pants LOL. To my horror I had to sew four buttonholes this last weekend. Ughhhhh! My buttonhole attachment for my machine has never worked properly so I did them manually. They came out ok but I definitely need to practice more. Wish I had your tips first!
PS-Finally making a Xanthea, cut it out last night, Yay!
You’re not alone in your buttonhole aversion. Some people have told me they won’t ever make anything that has buttonholes – like you, their machine makes unreliable buttonholes so they choose their sewing projects around that. Good on you for doing them manually!
I’ve got the same issues with my new (and expensive) sewing machine with a buttonhole mechanism. I try to avoid having to make buttonholes – especially if there is anything that the buttonhole attachment can get hung up on.
I have become quite experienced at unpicking buttonholes or fixing them by re-sewing part of them with a zigzag stitch. I even try to avoid buttonholes by using snaps, or bar and hooks. Bound-buttonholes or loops are also an option…
It is really a shame that buttonholes are not any easier on the modern machines. You might be able to get a vintage buttonholer which is much more reliable. I’ve got a Greist one for my great-grandmother’s Pfaff which can only sew straight stitches. Unfortunately it does not quite fit and takes a bit more fiddling around until it is set up. So I don’t usually bother to install it for one button – although that would usually be the less stressful route…
Sending greetings from Germany
That is such a pity – buttonholes should be a pleasure and joy on new machines, not something to be avoided because they’re so unreliable.
I wonder if your sewing machine mechanic can do anything with it when you get your machine serviced next?
Best wishes from Down Under.
Finally I have found a mention of the buttonhole issue that has been driving me crazy – the zigzag not dense enough on one side! I couldn’t find anything about this issue anywhere and thought it was just me, or my machine. Thank you so much for posting this, I have been avoiding button holes and just using hooks and bars instead. I am using a Pfaff and it’s such a beautiful machine, but this uneven buttonhole was driving me to despair.
I will try doing one side manually myself and see if perhaps I can start to have button closures after all this time. Thank you!
Glad to be of service! You would be surprised at how often this happens to people, even with expensive machines, and they do what you’ve been doing: avoid projects with buttonholes and/or use something else like hooks. I hope you can get it sorted.
Liz, you are my hero! I was not looking forward to doing my buttonholes twice again so I tried the stitch length trick and it was perfect. Thanks for making my life easier.
Thanks Jen, gotta love the old stitch length trick!