Here's how to make your own compost bin in 8 easy steps
A DIY compost bin is easier than you think
 Credit:
Reviewed / Getty Images / ThamKC
Credit:
Reviewed / Getty Images / ThamKC

Recommendations are independently chosen by Reviewed's editors. Purchases made through the links below may earn us and our publishing partners a commission.
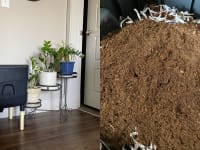
Compost bins are a popular way to recycle food waste at home, turning your food scraps into soil that can be used in gardens. Building a DIY compost bin is an easy project that you can tackle in just a couple of hours.
Technically, all that’s needed to compost food scraps is toss them into a pile and wait. However, that solution stinks, literally, and is likely to attract all the neighborhood wildlife to your backyard.
Having a dedicated compost bin keeps those food scraps secure, cuts down on the smell, and actually speeds the composting process along, giving you a better final product faster.
With a few materials and tools, you can easily make a DIY compost bin—here's how.
Tools you’ll need
Materials
- Locking plastic trash can
- Grass clippings, dead leaves, and yard waste
- Food waste
- Composting worms (optional)
How to build a DIY compost bin
Step 1: Pick the right location

Compost bins are a popular way to recycle food waste at home.
The ideal location for a DIY compost bin is in a level, out of the way area of your yard, preferably a decent way away from your house to keep the smells and curious critters away.
Composting can work in either sunny or shady areas, but each has unique challenges.
Sunny areas will make the compost decompose faster, but also dry out faster, which means you’ll need to water the bin more frequently. Shady areas retain moisture better, but will also take longer to get to usable compost.
Step 2: Prepare the area
Dig out an area of the yard down to dirt large enough for the base of the trash can to sit in.
Level the small hole as needed to make sure that the compost bin sits flat and stable on the ground.
Step 3: Drill holes in the bottom of the bin

A drill and shovel are essential tools for making a DIY compost bin.
This may seem counterintuitive, but you actually need to have holes in your compost bin connected to the ground. These allow worms and bugs to crawl into the compost and speed in the decomposition process.
Use a hole saw to cut five or six 1- to 2-inch diameter holes in the bottom.
If you are putting the compost bin in an area that doesn’t touch soil, like on a deck or paver patio, then don’t drill these bottom holes.
Step 4: Drill air holes in the sides
Compost also needs air exchange in order to decompose effectively. Using a half-inch drill bit, drill a lot of holes in the sides of the trash can.
These should be 10 to 12 inches apart, all the way around. (Yes, there are a lot of holes.)
Step 5: Add yard waste to the bottom of the compost bin.
Add a hefty layer of grass clippings, dead leaves, and other yard waste to the bottom of your compost bin. This yard waste adds nutrients and microorganisms that food waste alone probably can’t provide. It also adds more material to be turned into soil.
Step 6: Wet everything down

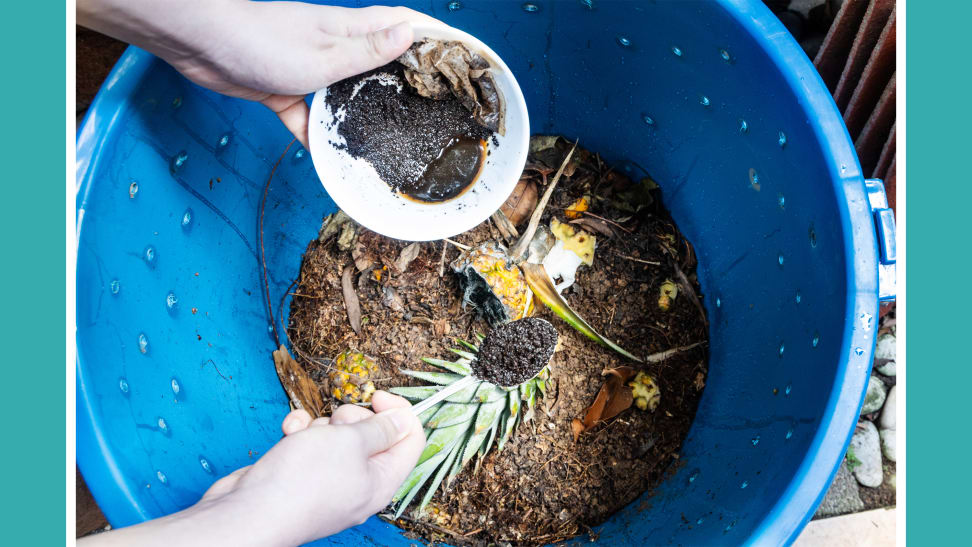
Old food and vegetables are ideal for creating compost.
Wet down the dirt around the DIY compost bin. This will help attract bugs and worms to the area, making it more likely that they’ll climb in and make themselves at home, which is exactly what you want.
Then, lightly wet down the material inside the compost bin. You should keep it wet, particularly early on, but not soaked.
If you don’t have access holes for insects in the bottom of your bin, you can add worms yourself. You can dig these up in your yard, or you can order composting worms to move the process along.
Your waste will still compost without the bugs, but they make it happen faster and more efficiently.
Step 7: Add your food waste and stir vigorously

Once the compost is read, take it to your garden, spread it around, and watch in amazement as your plants grow strong and tall.
Add vegetables, fruits, and eggshells as you use them.
As you open it up to add more food waste, give it a good stir with a shovel. This is a stinky job, but stirring helps to speed along the decomposition process.
Step 8: Sit back and enjoy
Once you’ve filled the bin as much as you plan to—remember, eventually you’re going to have to empty it—sit back and let nature take its course.
Keep the lid closed tight except to check on it and maybe give it a stir every few weeks.
Once the compost is read, take it to your garden, spread it around, and watch in amazement as your plants grow strong and tall in gratitude for the nutrient-rich soil you’ve provided.
When the growing season ends, you can add those same plants back into the compost bin for next year.
What to know about composting

Compost is ready when it's brown like dirt and there are no recognizable pieces of food. It should also be mostly dry and not hot.
Given the right conditions and enough time, any organic material will break down. However, your backyard probably isn't the right conditions for everything, and you probably don’t have enough time to wait.
Backyard DIY compost bin setups aren’t good for dairy, meat, bones, or oil. These all take a long time to break down and require more heat to effectively compost than you can likely generate in a trash can.
Stick to plant matter—fruits and vegetables will do best.
If you want to be able to compost absolutely every scrap of food you have, consider investing in a composting service.
Having more than one DIY compost bin staggers your yield
While one bin works, it’s often better to have two or three bins at different stages in the composting-at-home process.
Fill one for a few weeks or months, and then let it sit, undisturbed, while you fill the next in line. You can alternate back and forth as the compost in each bin finishes.
How to know when your compost is done
The decomposition process takes a long time, and it’s hard to give a precise estimate for how long you have to wait. Generally speaking, it’s going to be months before the food is broken down into soil.
Compost is ready when it’s brown and looks like dirt, has no recognizable pieces of food, is somewhat dry, and isn’t hot because there is no longer heat being produced by the decomposition process.